
There's a first time for everything
Well that was weird. I’m kind of a details oriented idea guy - that’s sort my thing when designing for health care and medical devices with my alter ego Stick Design Group. So it’s always pretty interesting when a group of engineers, whom I share a fantastic co-working/start-up/crafty/artsy ecosystem with in Hamilton’s Cotton Factory, ask me to help them out with something. Their projects are usually so different to mine, so it’s pretty cool. I recently helped them out on static discharge tails for wind-turbine blades. These things went from being a quick doodle in my sketchbook to being in actual wind turbines in something like 10 days. There’s a plucky agility about them and what they’re doing that I love being part of, which, if you’re accustomed to working in around ISO 13485, is a breath of fresh air.
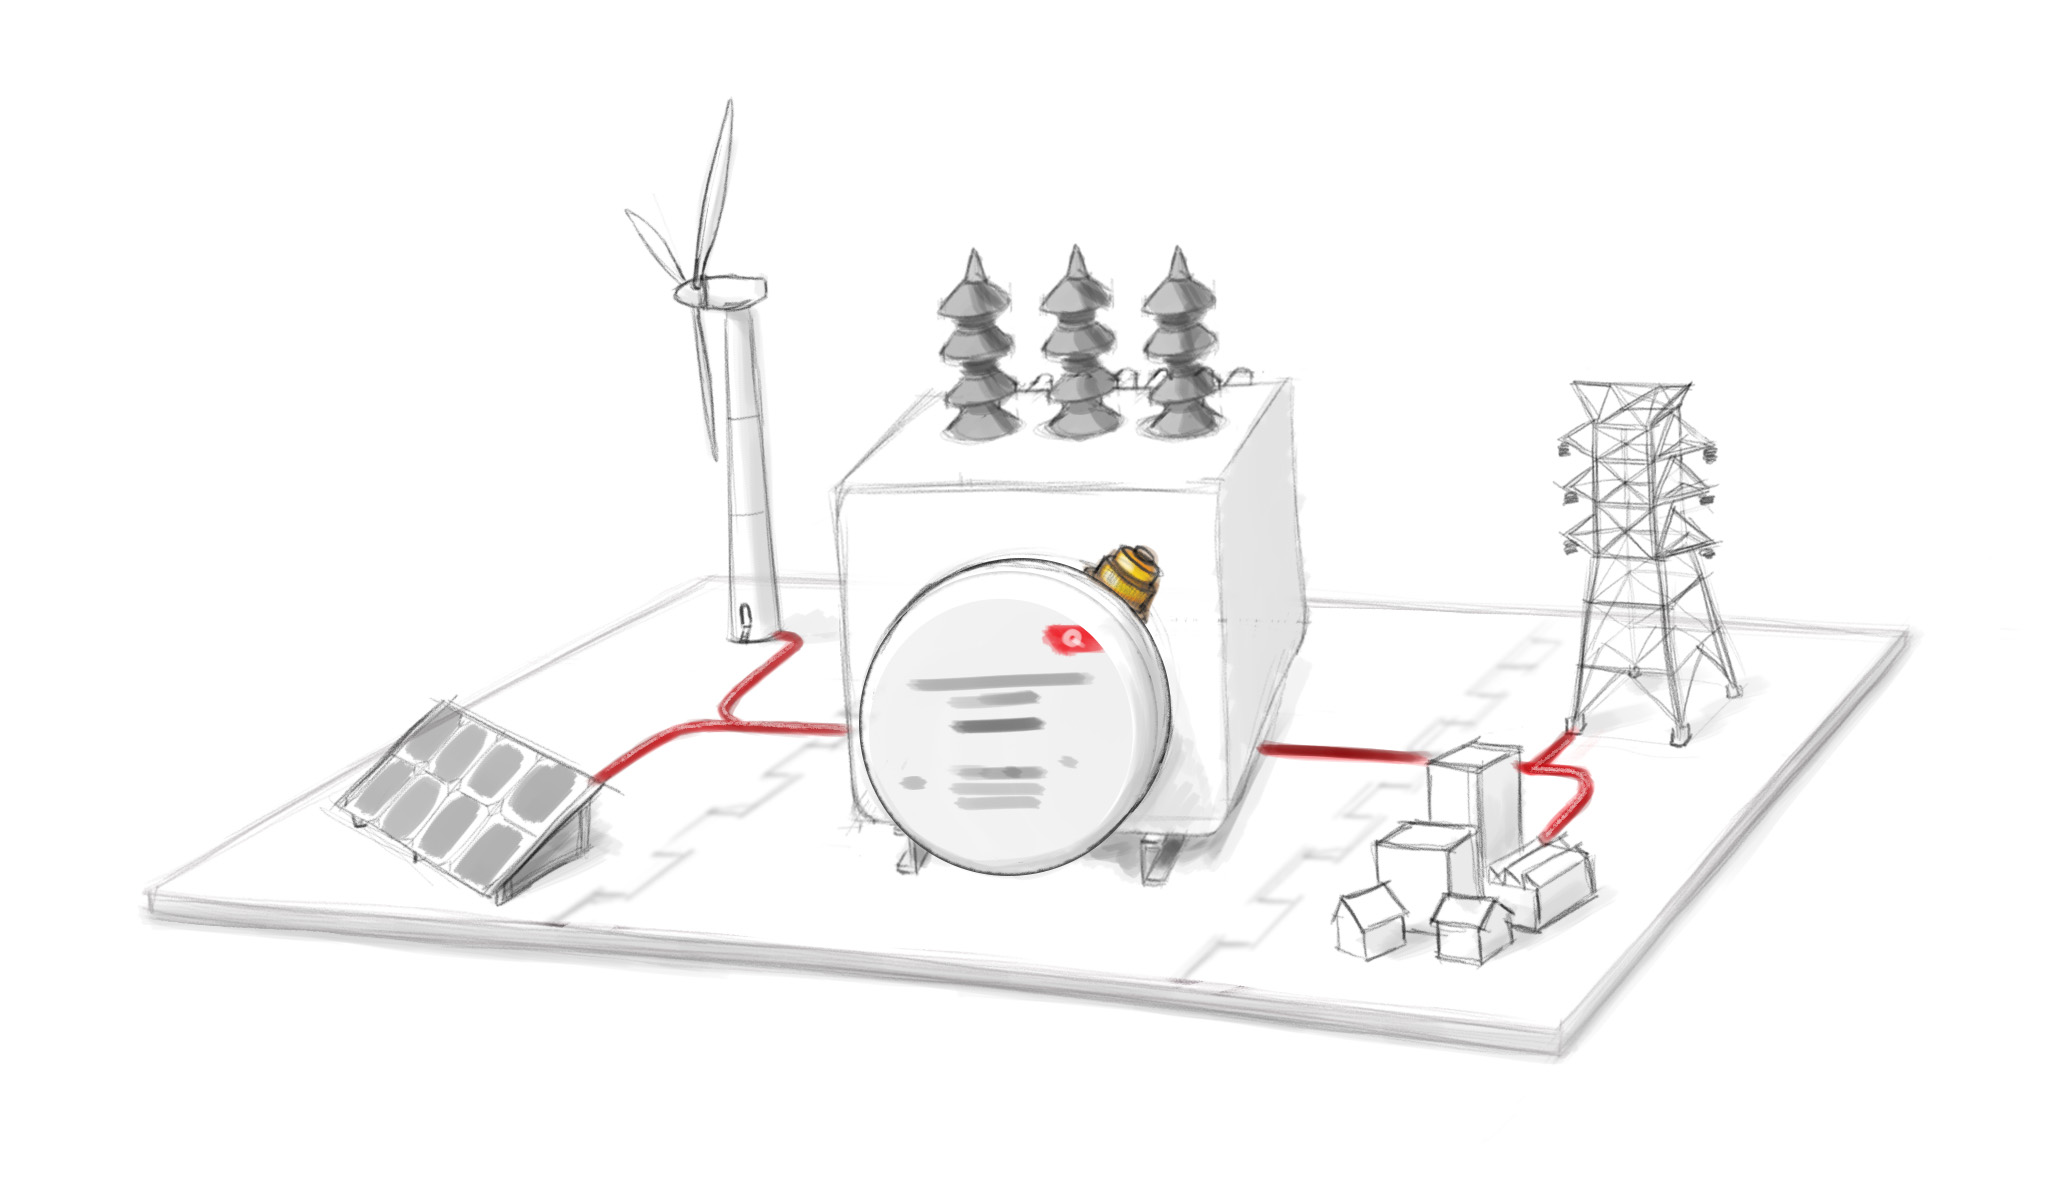
This time, it wasn’t so much ideas or fabrication advice they were after, it was actually fabrication: they needed a trade show model. Not being a real student of trade shows, I gather that if you don’t have anything physical for people to stare at or fiddle with and examine, you might have a lonely day there in your booth. In this case they needed an attractive model to explain the context of a “dissolved gas analyzer” in the whole power generation grid…uh…thingy. So a dissolved gas analyzer is used to monitor the state of the oil in electrical transformers, and thus monitor their health. Theirs is a nice little IOT system, networked over LTE. Anywho, they needed a kind of physical diagram showing a wind-turbine and a commercial solar panel feeding into a medium voltage transformer (which are normally small-car sized), a life-sized gas analyzer attached to it, a transmission pylon and a destination for the power - a town - all on a nice clean white baseboard.
And all in slightly more than a week. Croikey.
So we agreed on a sketch and didn’t pfaff about too much on that since I really needed to get moving on making stuff. And make stuff I did. Here’s a recap:
The first sketch! Approved
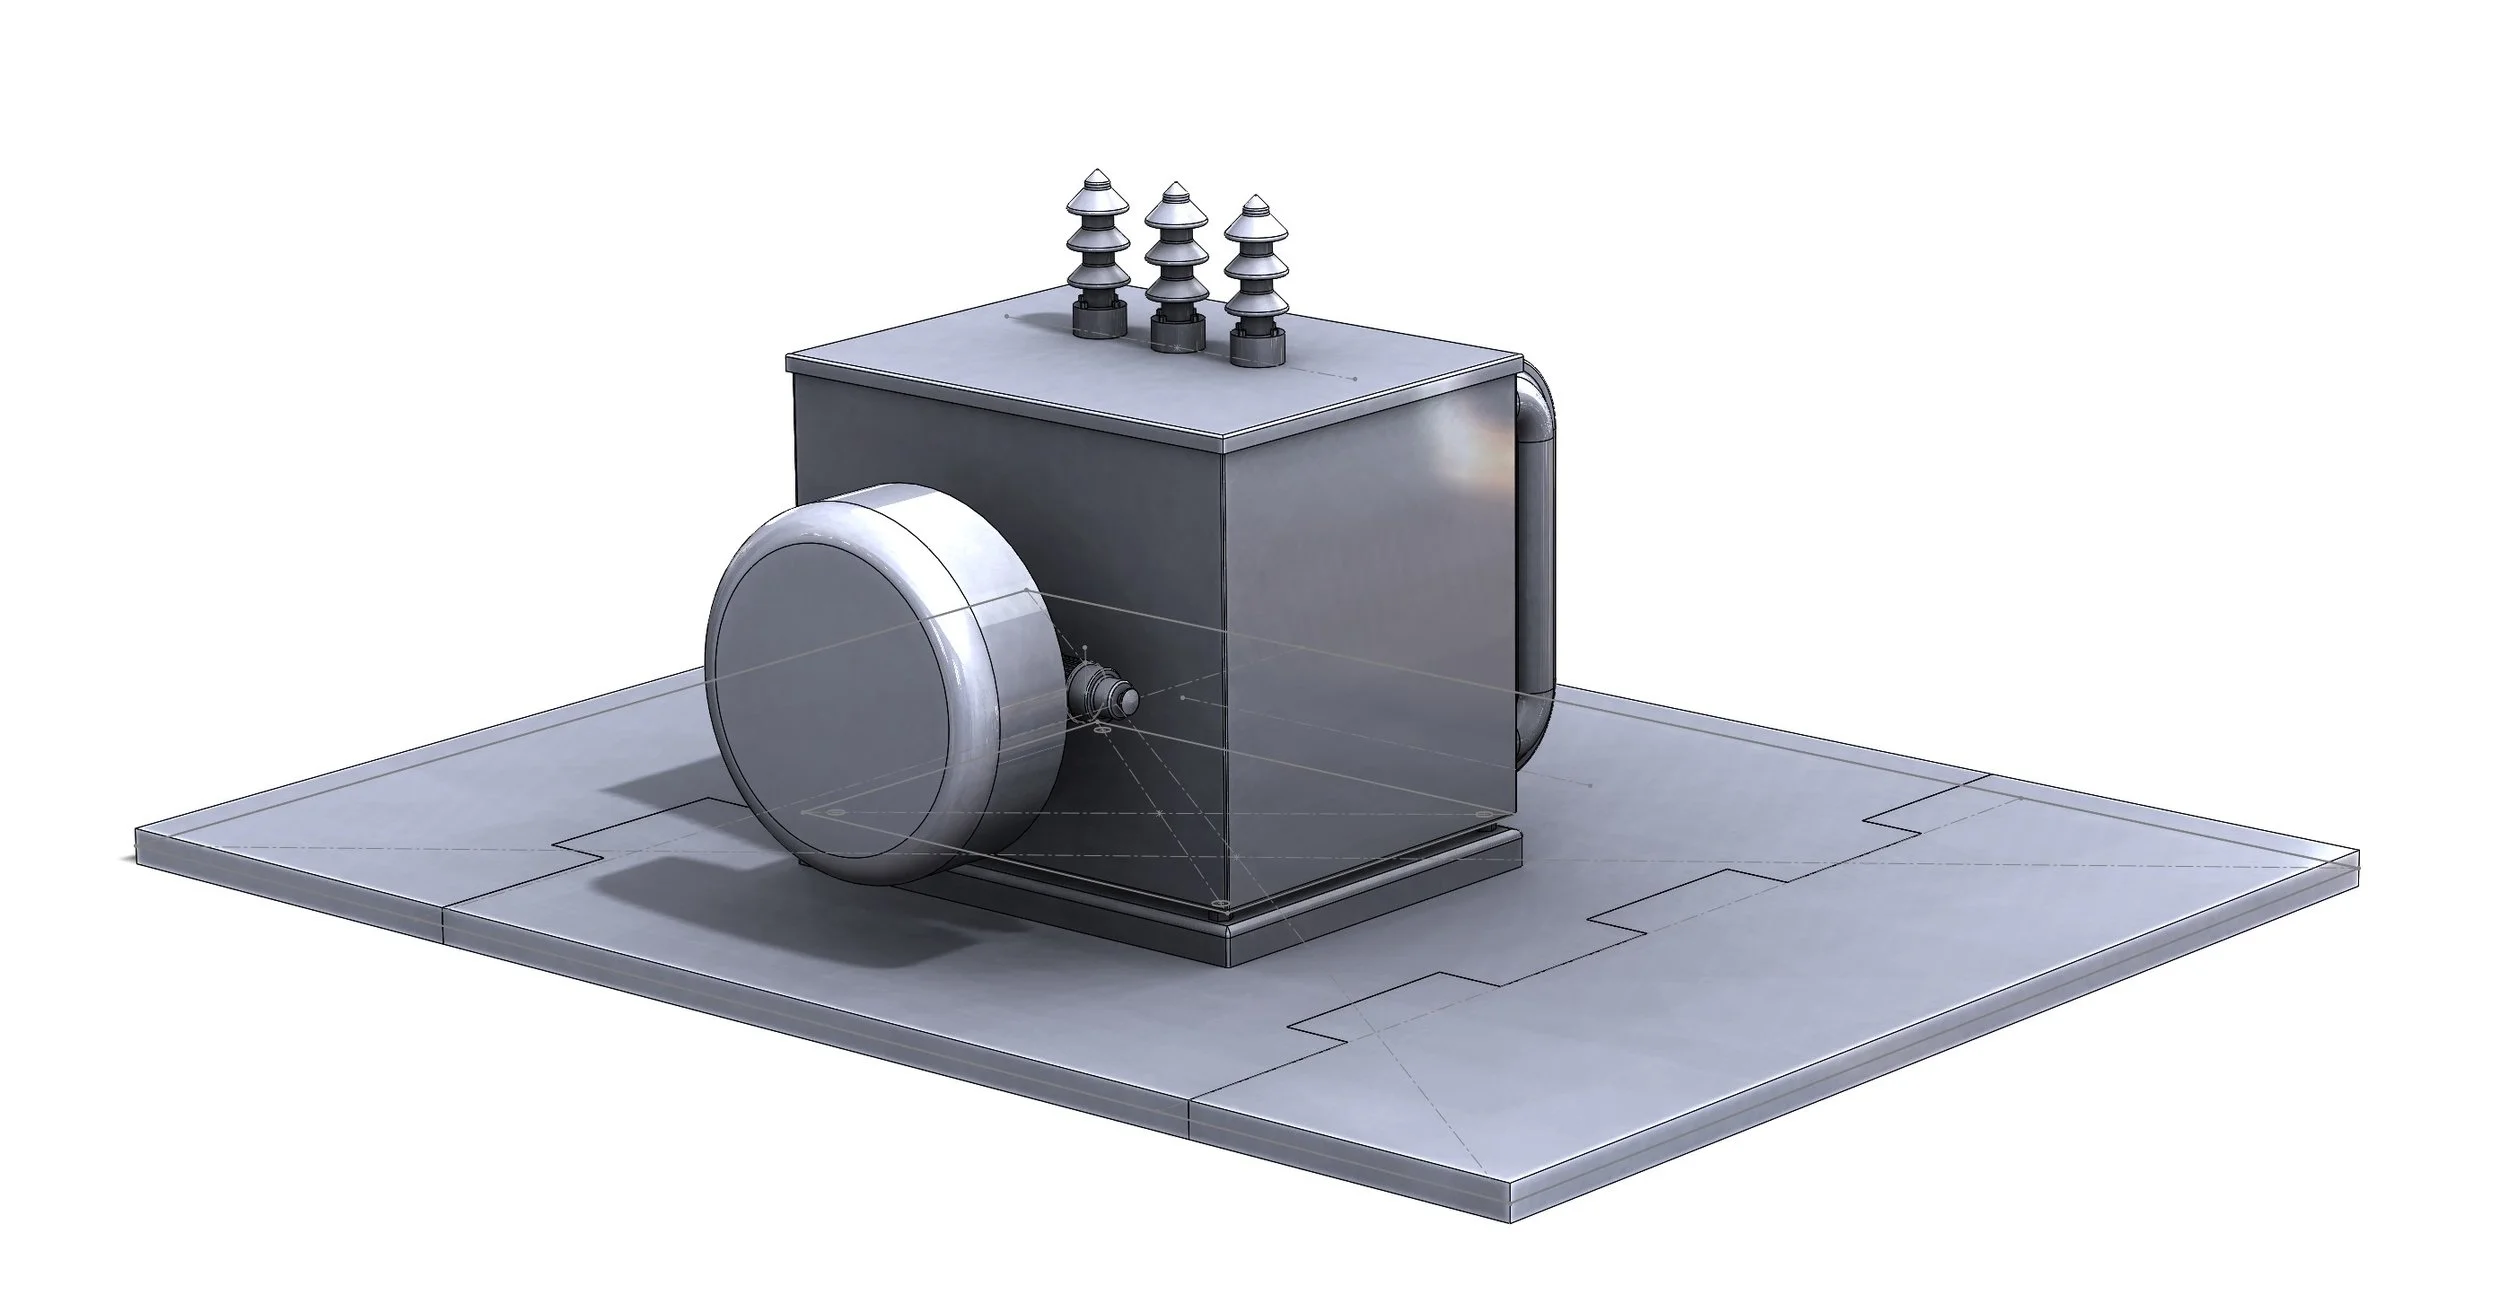
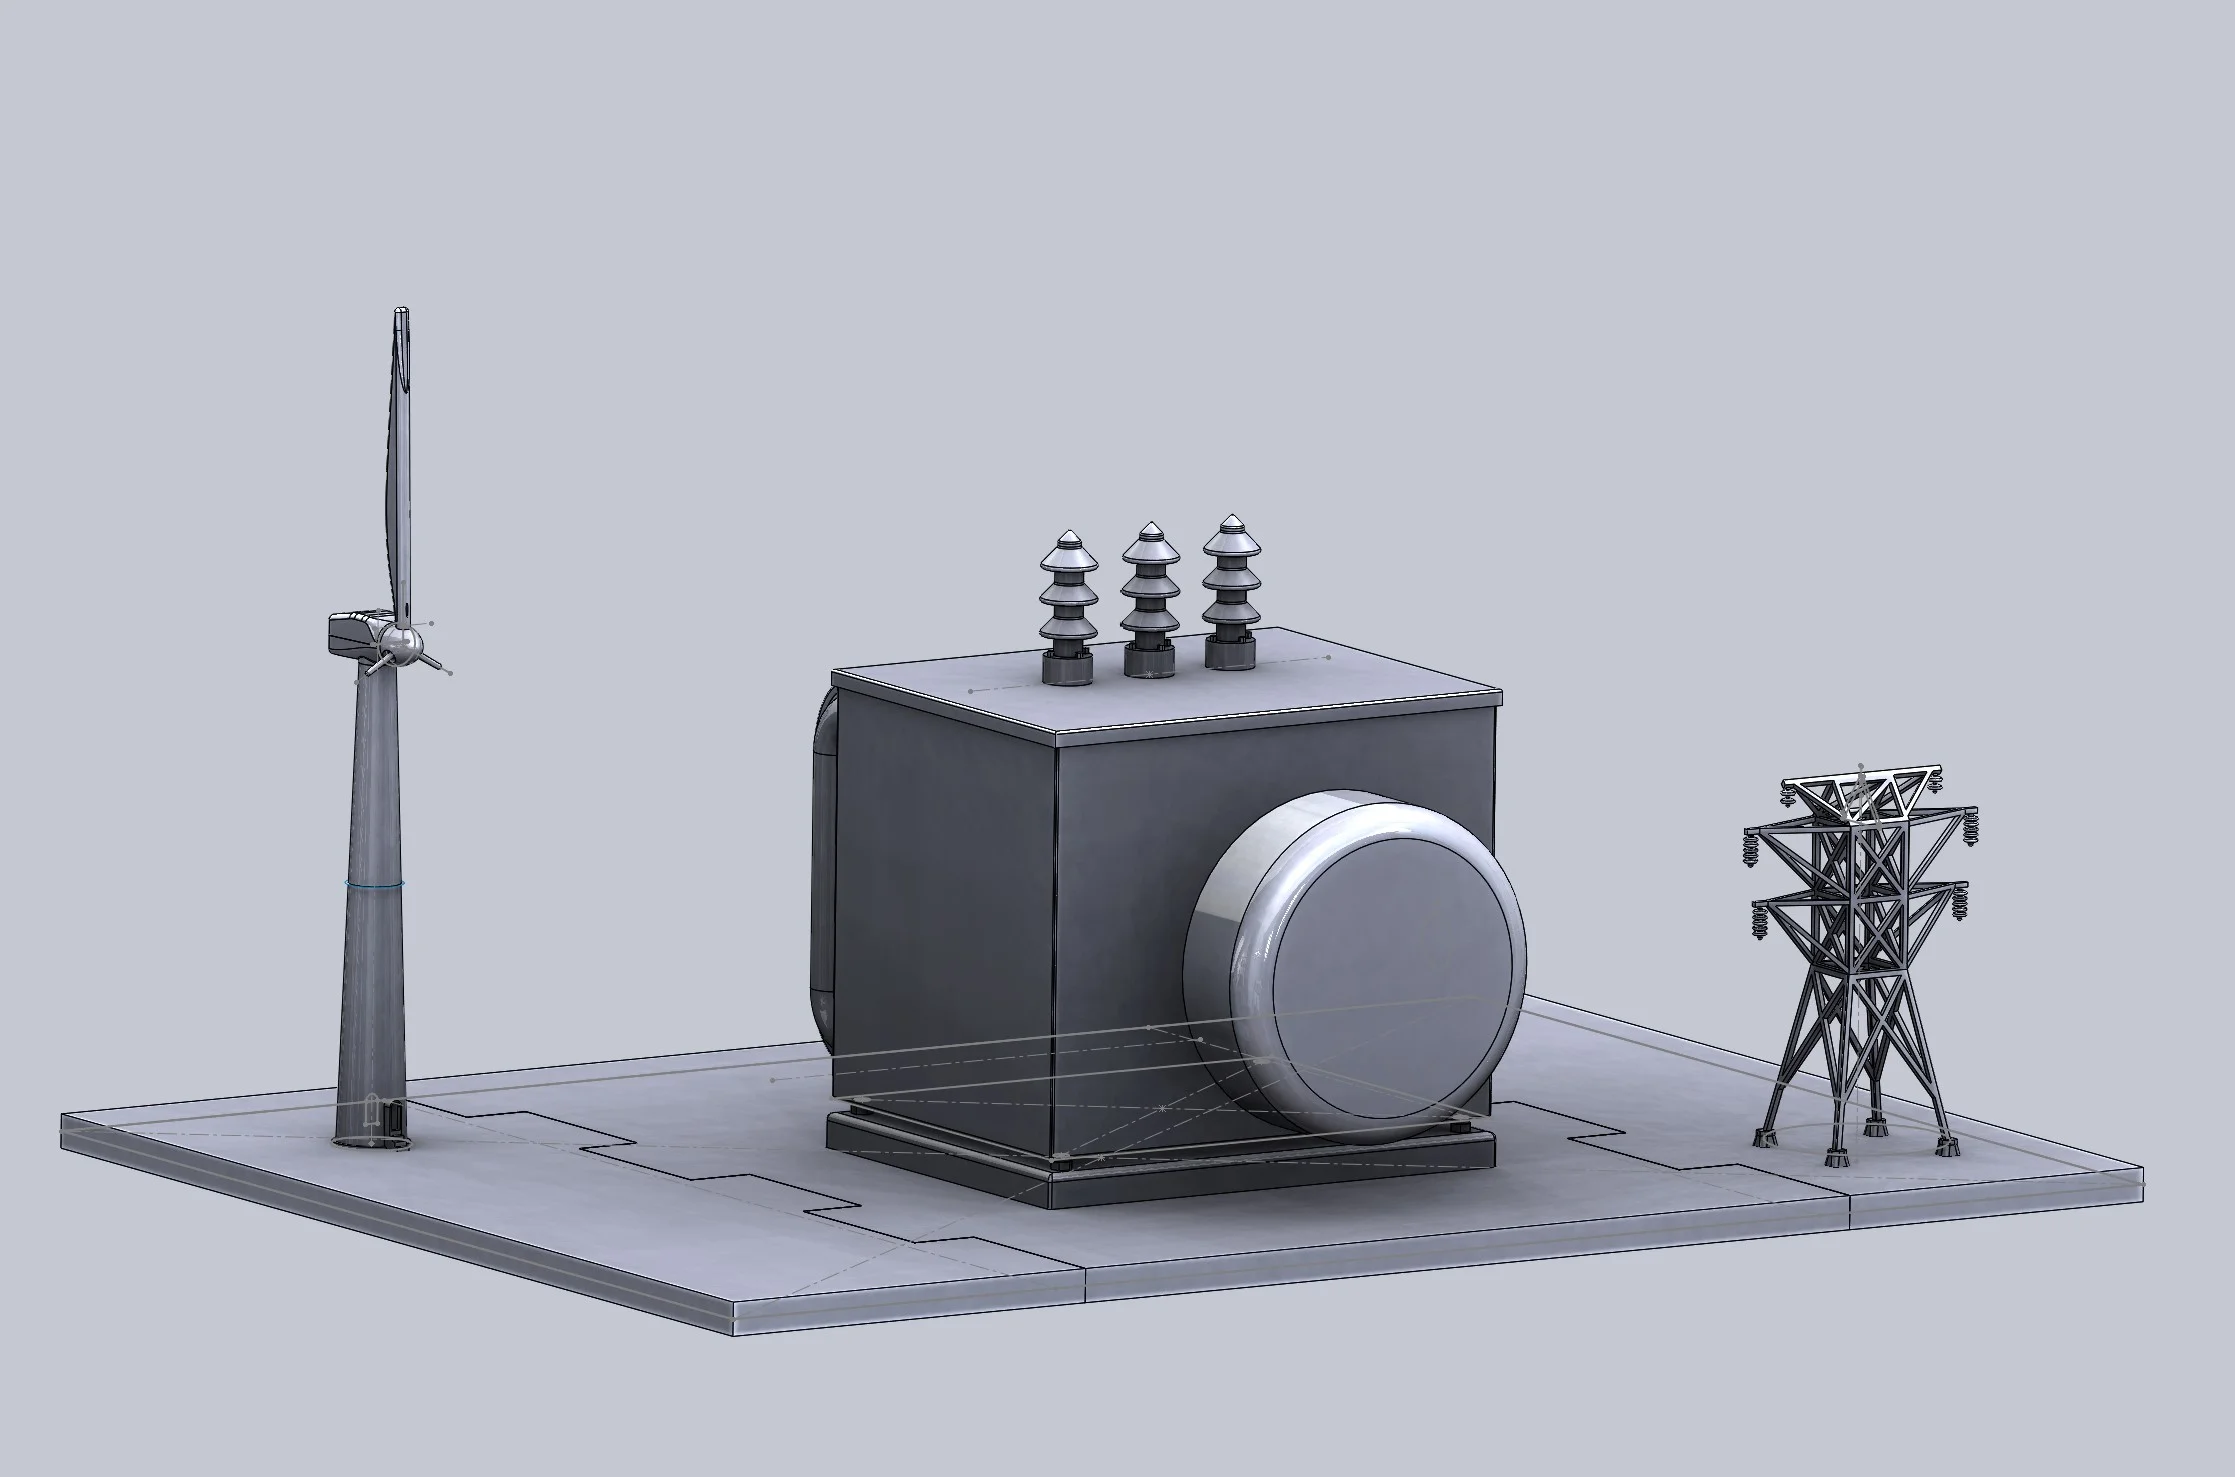
The first bit of CAD modelling based on the actual DGA and the base dimensions of 18”x24”, which needed to break down to fit in a suit case (or something).
The base drawings were whipped up toute-suite so we could source someone to cut that out of MDF on a CNC cutter. That way it wouldn’t be the last thing we were waiting on...though it very nearly became that way. Let’s just say some lessons were learned, though not about CNC milling.
Some of the bits and bobs in CAD.
Given the short time frame, as soon as I had some models made they were being uploaded to the 3D printer. Since the transformer itself is larger than what I can print on my Formlabs , it had to be broken down into portions and printed that way, which meant full runs. The printer worked without rest for about four days straight. I think I’m in a position to comment on its performance but will save that for a separate post. It’s important with short turn-around projects to a) not make them more complicated than they need to be, b) to not make mistakes that can’t be recovered from (a fine axiom to have when designing anything really), and c) be as efficient as possible. One mistake that was made was that transmission pylon (above): way too delicate. I redesigned that. Another teachable moment, particularly with the Form2 which is a sintered laser printer, was that you need to provide sufficient time for printed parts to cure. Normally, since they cure under UV light, you can just put them out in the sun. But it happened to be a rainy dull week here, which had me grasping for cheap, fast solutions. Turns out you can’t glue or paint these prints unless they’re good, dry and hard. So I found this UV lamp at good old Canadian Tire for $14 CDN. I think it worked. At least I think it worked like one thinks a placebo works. It eased my stress at least.
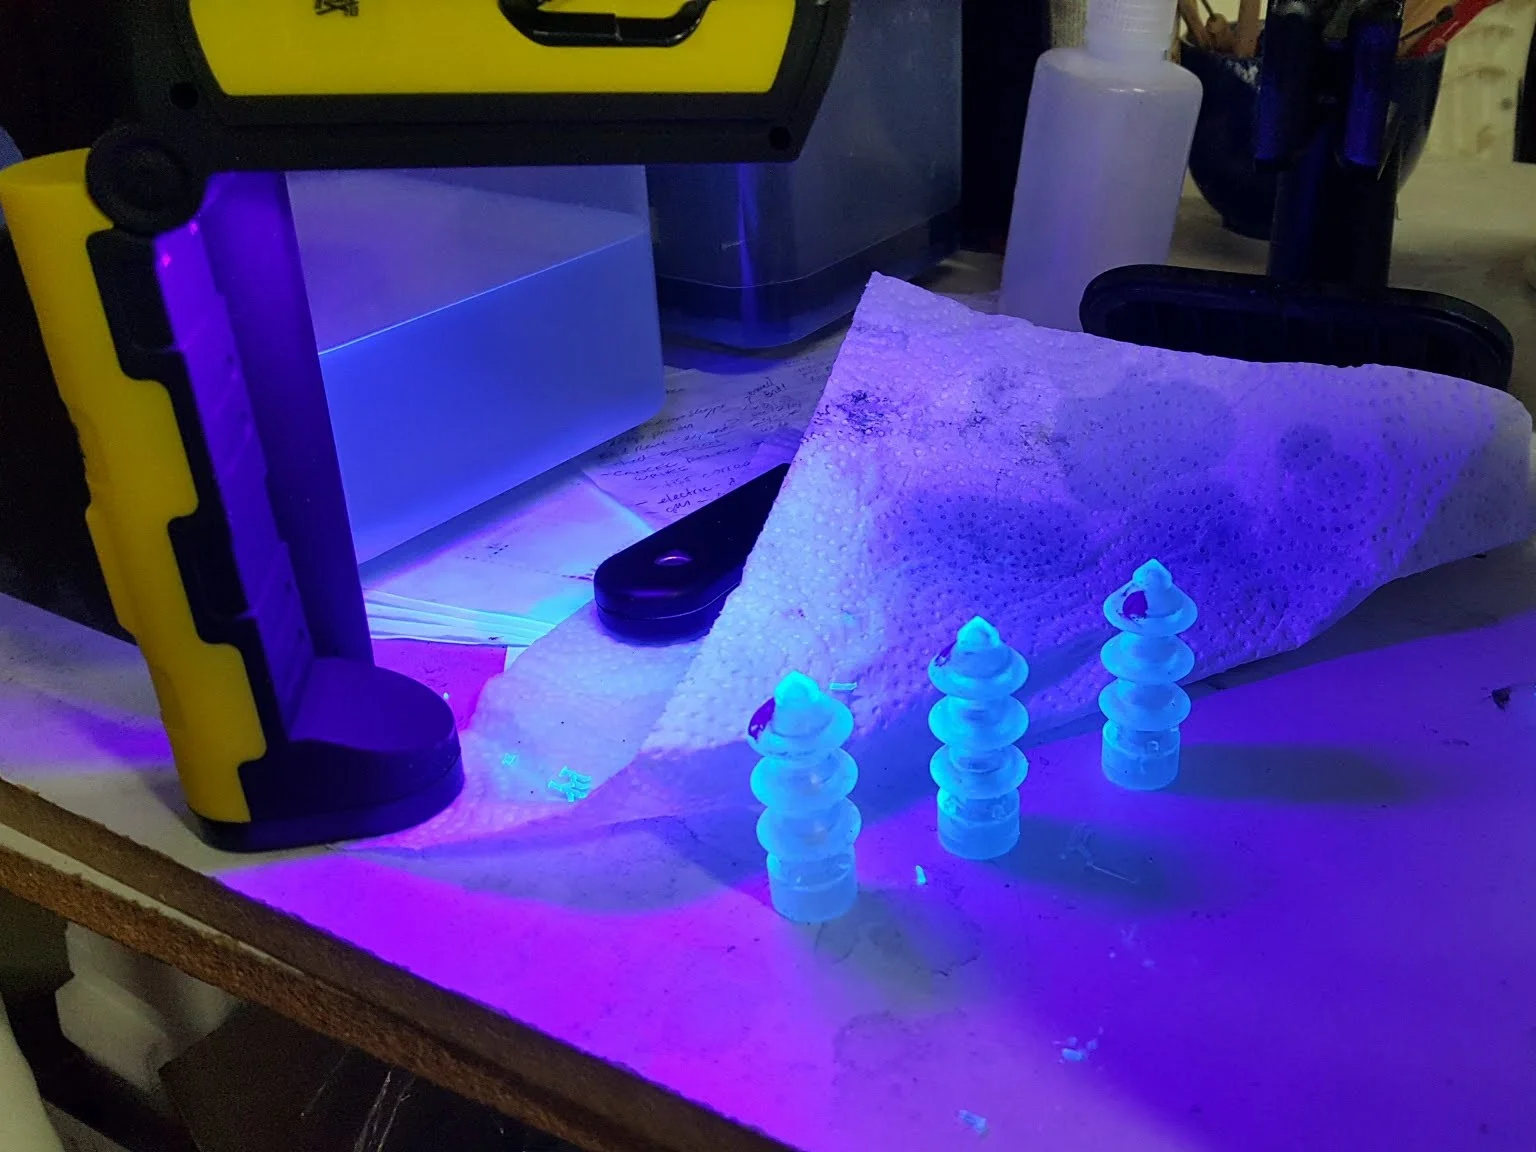
Here is my little hero which I think it actually curing my 3D prints, but that feeling might be the placebo effect.
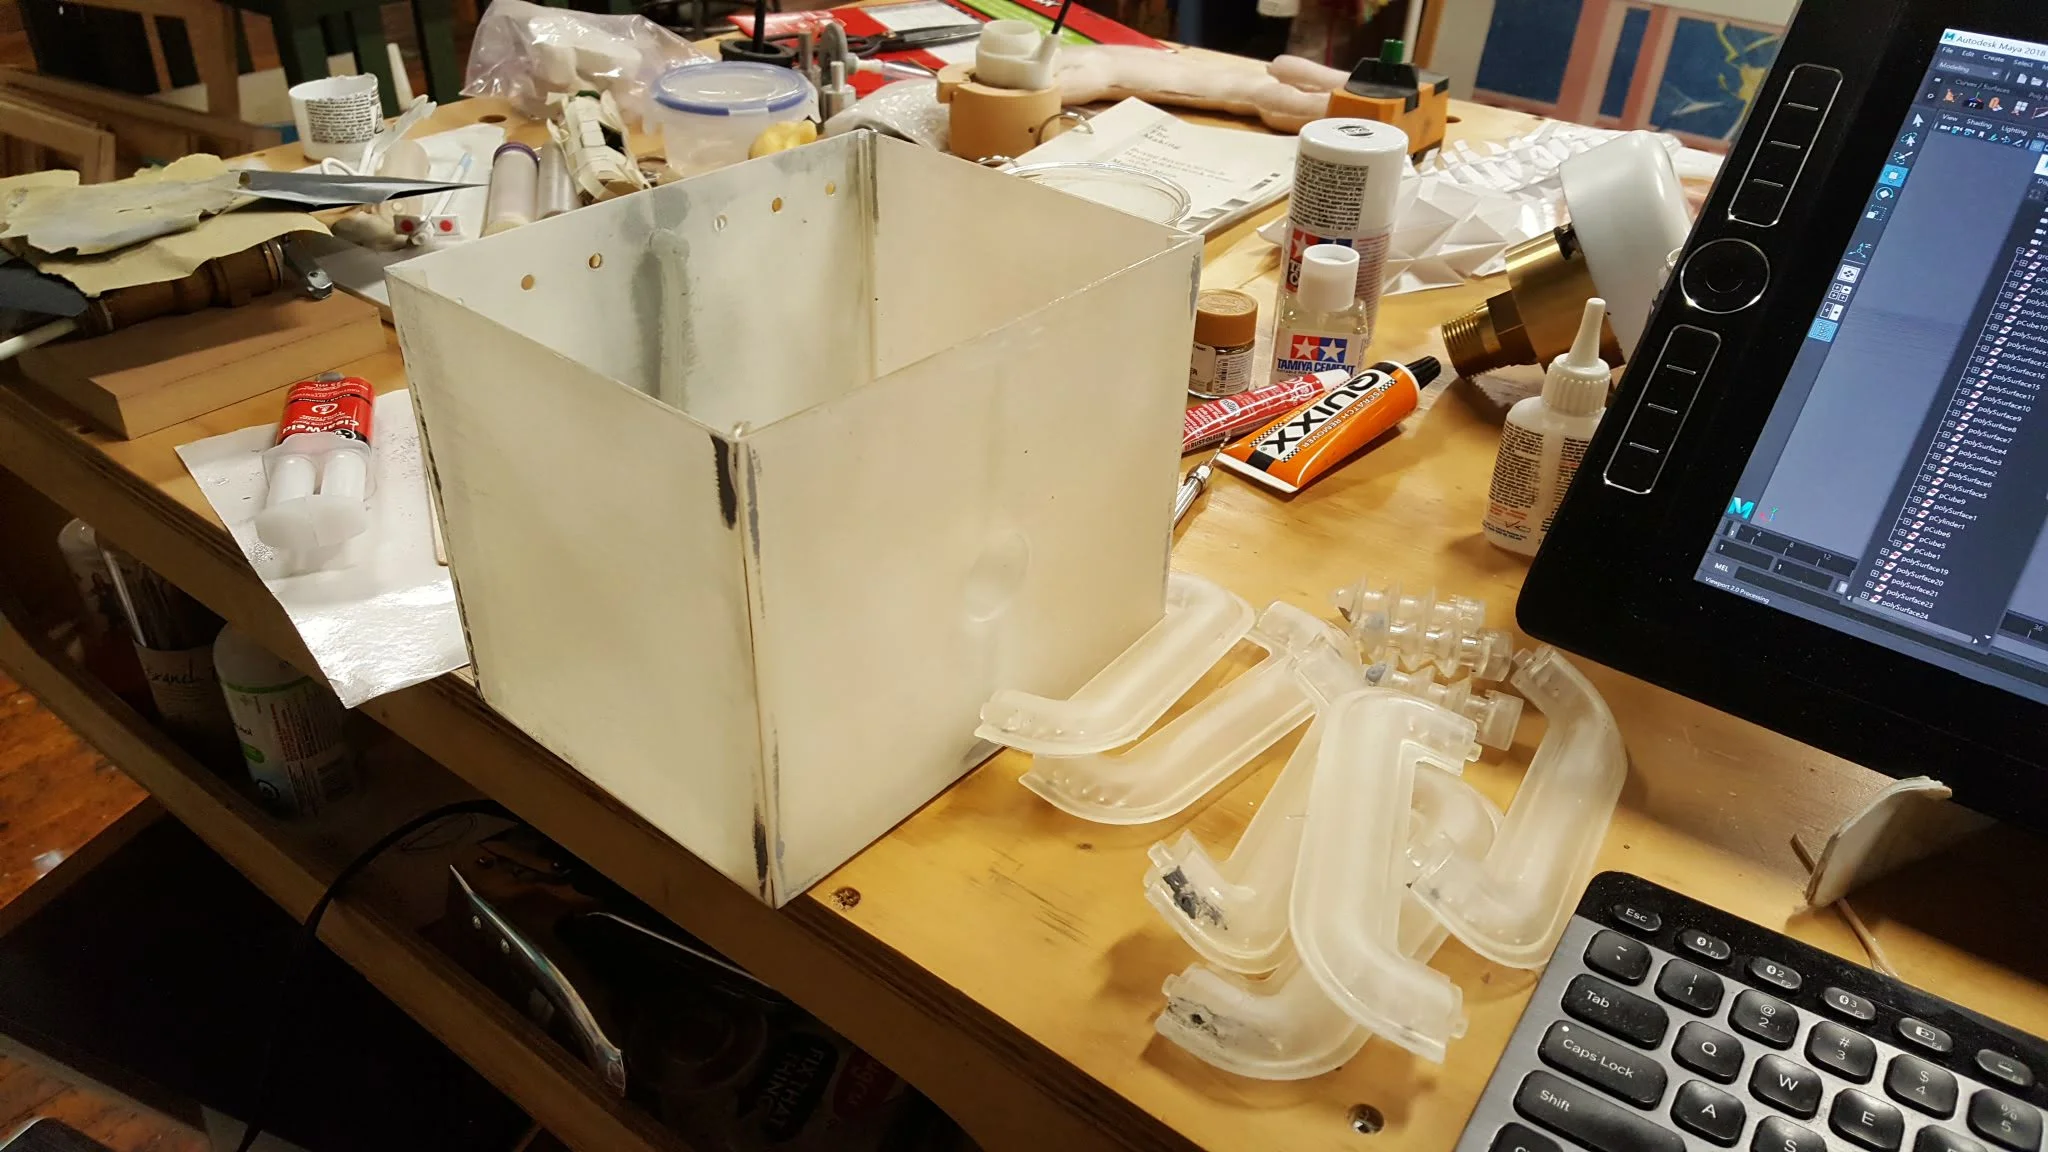
A wack of prints. While I printed the details I started gluing the panels of the transformer together. Gluing and filling and sanding.
It turns out you can’t glue Formlabs resin. That was another lesson learned. I tried classic model cement, cyanoacrylate, and something else entirely. I think the only thing that can glue 3D printed resin is other resin: either extra liquid resin from the tank cured by laser or, ahem, UV light; or epoxy resin. Epoxy resin it is.
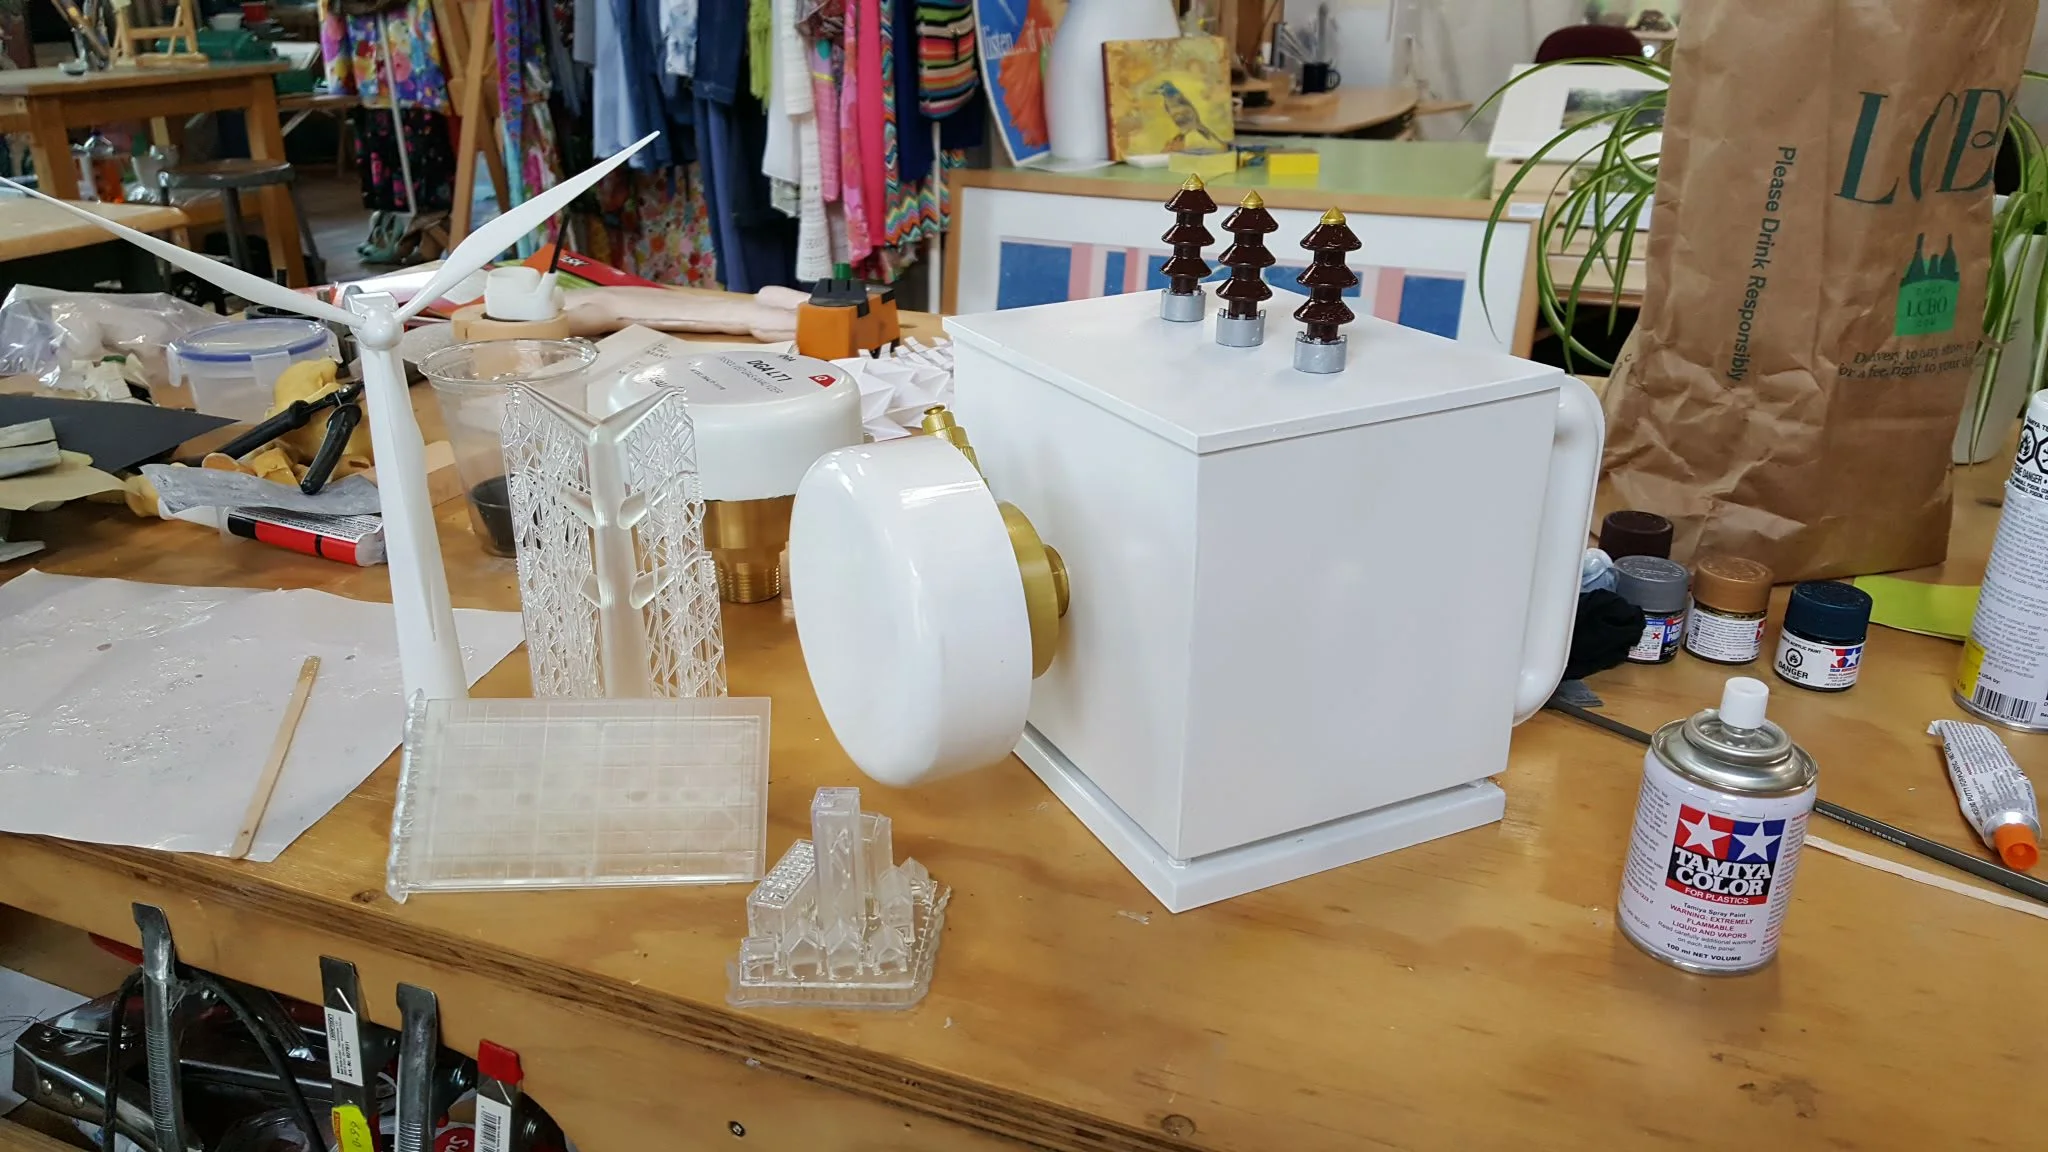
A more or less finished transformer and a wind turbine, plus the raw, fresh from the tank 3D prints. Progress is good!
The modeling part is always fun. I used to work in Maya a lot, since that what I learned on way back when I was at Sheridan for Computer Animation, but I’ve noticed lately that I’m more comfy now in CAD. That’s weird because CAD isn’t artistic in any way, it’s made by engineers for engineers or technicians, not artsy farts like myself. There is nothing intuitive or organic about it. I mean, it’s hard to even model a spoon in CAD. Anywho, most of the luck was had in CAD, and then the rest of the assembly and painting were done post 3D printing. Finally, I could use all those nerdy skills I acquired while building plastic model kits of tanks and planes as a kid. Only this time I was designing my own kits and things, then painting them up. Apparently, I now take orders for them?
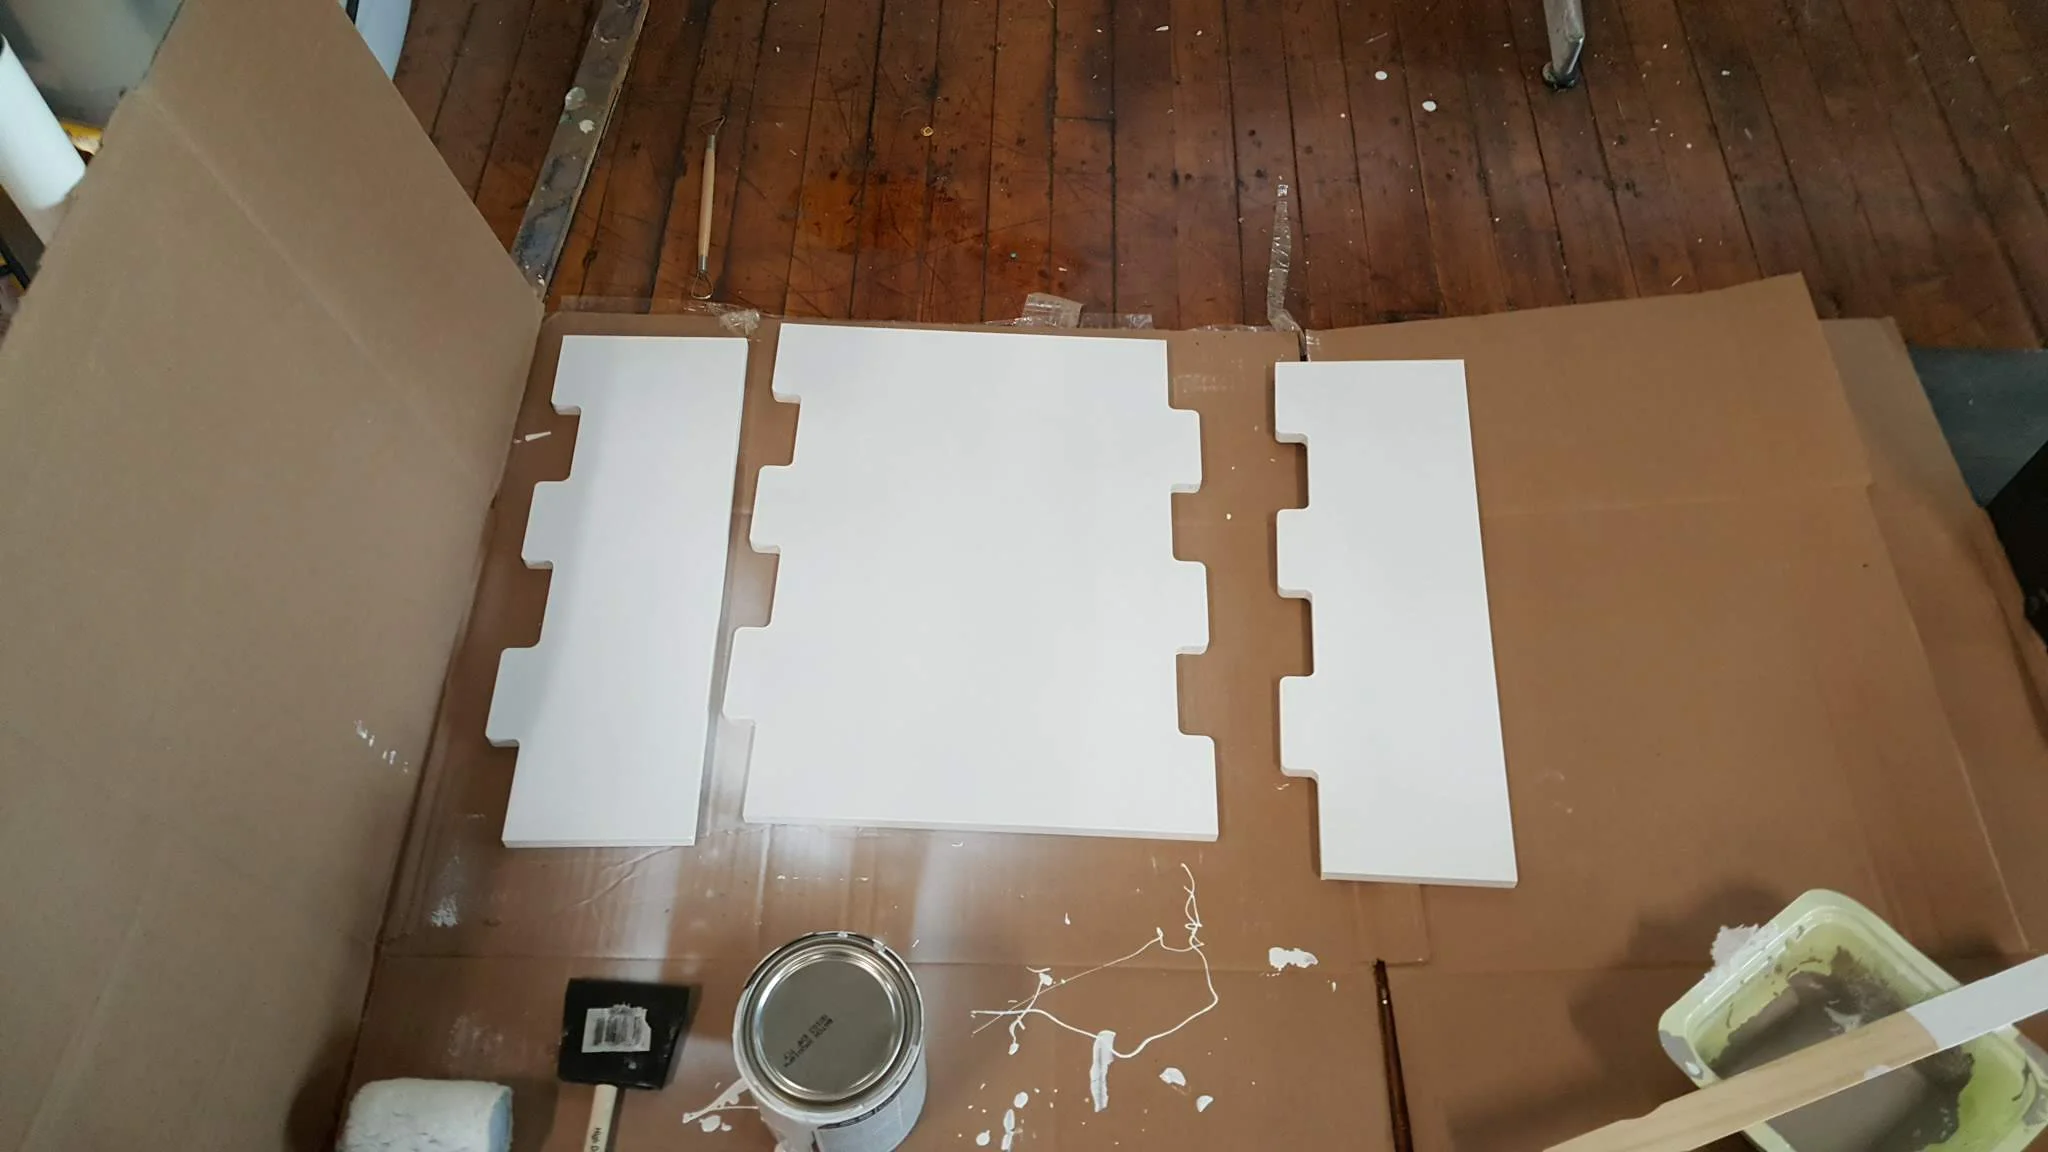
Painting the MDF base panels.
Next time I do something like this I think, while I wait for prints to come off, I might research finishing products and paint. The plan was to hit everything with a high gloss clear coat after painting it all white. How hard could that be? Unfortunately I chose my clear coat without doing any research and it damned near ruined the project. The one I chose, Tamiya Clear spray, mysteriously nearly ate some (but not all) of the paint that it was sprayed over. This was odd because those paints were also Tamiya paints, so there should have been some compatibility with one not trying to destroy the other. Mystery. So after the clear coat seemed to bubble the paint on some of the pieces I bought a different clear varnish: a more general purpose one for paintings. Figured that stuff might be less harsh since people don’t appreciate their paintings - oil or acrylic - being ruined. But if you know anything about varnishing paintings, you know that sometimes that can take a while. This is particularly true when it’s raining or damp out. After spraying the base with the final coat of this new varnish it simply pooled on the surface and remained completely liquid, lifting the carefully glued on graphics from the board. Oh balls. And it was a pouring out. Thundering and lightening. Biblical. The old Cotton Factory roof even sprung several dramatic leaks. This was a mess. It absolutely had to dry. This was the finish line, how could things have gone so badly so quickly?! I needed a hair drier, but the nearest one I had access to was 30 minutes away at home. I managed, however, to get into the communal kitchen and put the components in a warm oven with success. But not after using a clean rag, of course, to try mopping the excess varnish from the piece, proving once and for all that there is no such thing as a clean rag. My nice white board was sullied with sticky dark smudges and finger-prints. So I sanded the sullies and repainted them. Three times. And that was the best I was going to be able to do. So much for a leisurely, triumphant stroll across the finish line. Very nearly stroked out during it all.
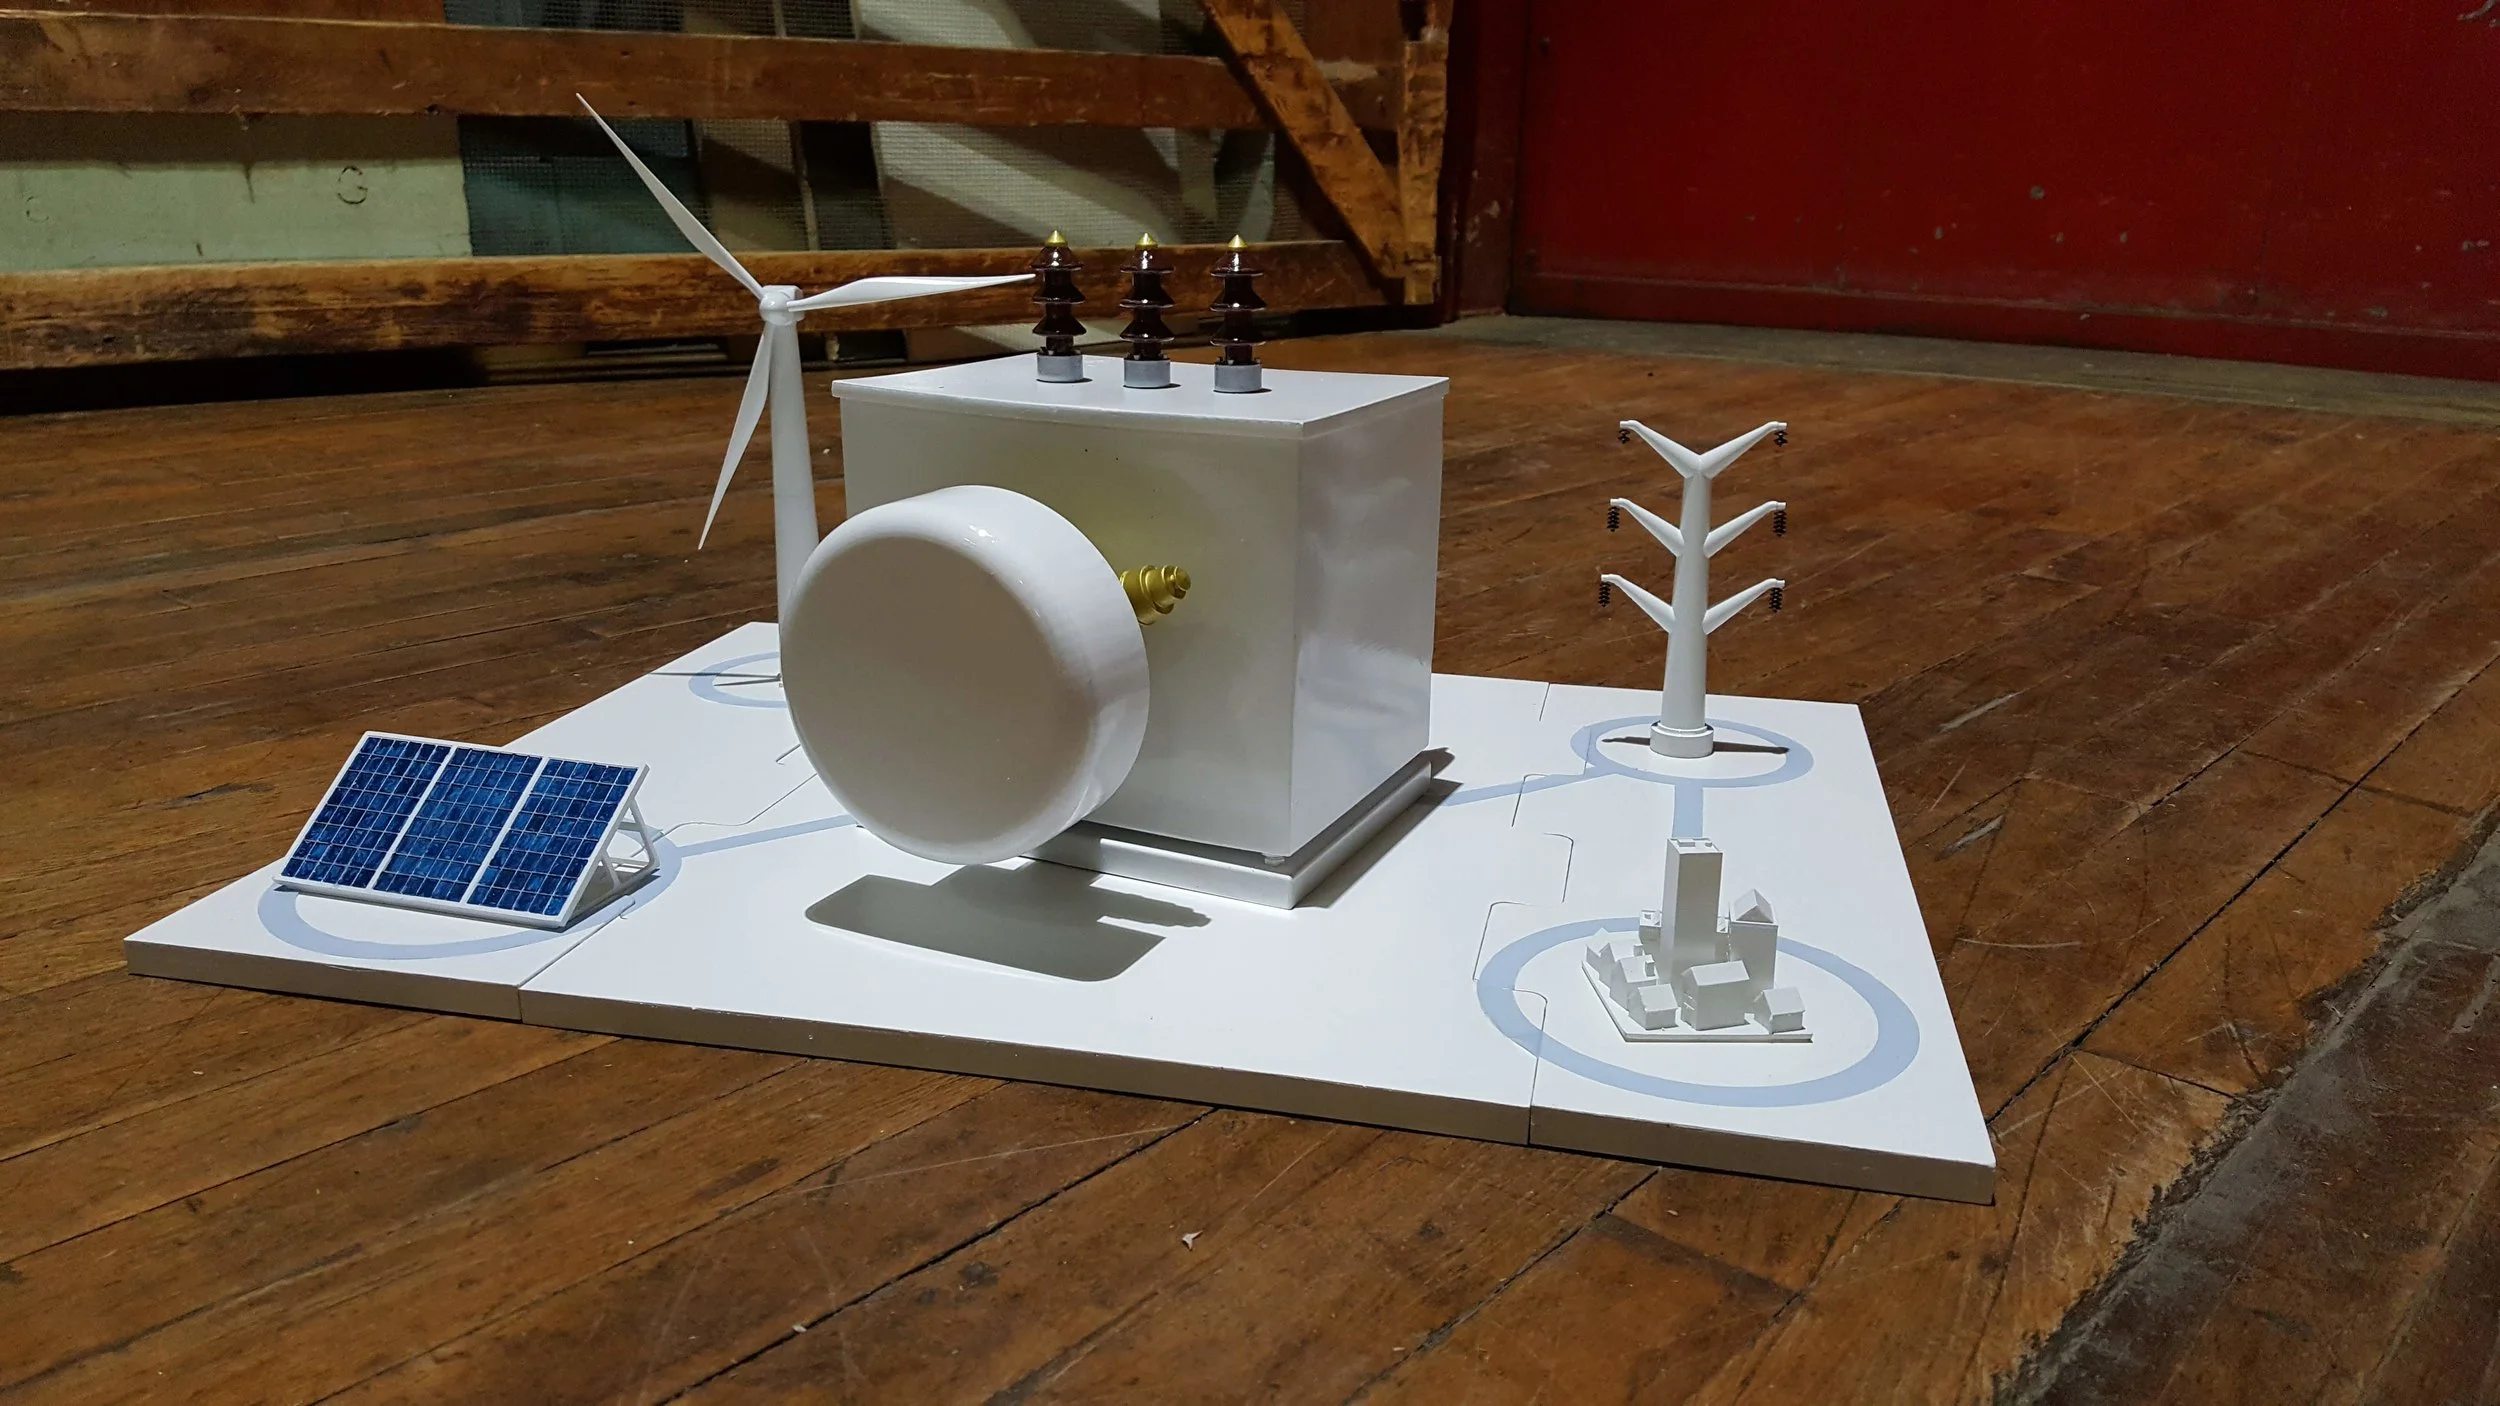
The finished model! You can’t even tell that I nearly ruined it all getting it over the finish line.
I’m happy with the end result! Everything looks like, well, everything. The town is a wee bit wee, and the transformer is a a bit boxy and weird, particularly with the out-of-scale DGA poking out the front (it’s supposed to screw into the drain plug on the transformer). But given the time-frame, and the fact that everything here was made by me in that time frame, I’m pretty happy. It’s satisfying to make stuff. I actually live for making stuff. But I think now with a bit of time to think about it more, I would have done the transformer differently. Always the perfectionist. I think it would have been way more effective to have a cut-away corner of the transformer, showing some of it’s electrical innards, the oil being analyzed etc, but then I am a medical illustrator and I do loves me a good cut-away whether on paper or as a physical model. And maybe I would have done something with the edges of the board.
There’s a first time for everything, and that was weird. I’m excited for next time.